Showing posts with label sew. Show all posts

DIY: Anthro-Inspired Scarf

I saw this darling scarf on Pinterest, which led me to the Sewing In No Mans Land blog, where I found the tutorial.  I found my material in the remnant bin at Joann's (score!) so my fabric was not as long as I would have liked.  If you want to wrap the scarf around your neck, I would recommend a piece around 2 yards long.


Materials:
A long strip of lightweight fabric (Mine was 10" x 46")
Sewing Machine
Needle and thread
Contrasting Fabric
Small piece of felt
Scissors

Directions:
Take your long strip of fabric and hem up the edge using a gathering stitch.

Do the same to the other side...


...and down the middle.


Because the fabric is so lightweight, it will automatically gather.  If you want it even more gathered, do so now before stitching the ends.


And thats it for the scarf! SO easy.  Now onto the flower. Cut a long string of fabric and do a gathering stitch on at least one side (I stitched both sides).


Gather one side, so begins to look like a flower.  Stitch up the ends.


Next, cut out four small circles (I used a shot glass as a template)

Fold each circle in half right side in.  Place one half circle on top of the other (picture below)


Do the same with the third...

...and fourth circle.  Be sure that they are layered in a way that a quarter of all four circles can be seen

Now fold your new, layered circle in half twice, getting a quarter of it.


Then take a needle and thread and hand sew the bottom corner, going through all circles.


And vuala! The center of your flower is complete.  If you'd like, you can glue the wrong sides together, so they don't show as much.


Cut a small piece of felt and hand sew it to the back of your flower


Then flip it over, and place the center petals where you would like them.  Sew that on, and your flower is complete!


Put your scarf on and determine where you want your flower.  Sew that on and you have a fabulous new scarf!


Keep in mind that this scarf will not keep you warm.  It is purely for fashion and fun! Plus, you can get away with it when it starts to warm up!


<3 Saleena


Continue Reading...

Tutorial : Fabric Flowers

I first stumbled across this brilliant tutorial when I was wedding planning.  I thought it would be great to make fabric flower center pieces (which go wonderfully with the vintage theme) and have them double as favors.  This could have been a possibility if 1. I had much longer to plan than four months and 2. lots of people willing to help out.  So if you want these to be part of your big day, or just want to add a little something t your home decor, these little treasures are sure to make you swoon. 


Materials
Cute Fabric (mismatch or coordinating) 
Thread
Sewing Machine
Glue gun
Iron
Fabric Scissors
Sticks (I collected them on the last hike Matt and I went on...don't tell the forest ranger!)
Glass Jar/Vase
Yarn (optional)


1. Cut fabric in 5" x 45" strips.  


2. Fold strips in half lengthwise and iron flat. (Your strip is now 2.5" x 45")

3. Open up strip.  Sew a gathering stitch along the pressed seam. Fold back into  place.

4.  To cut the petals,  scallop the open ends of the strip.  Each scallop is approximately 2-2.5 inches.  If you make a small mark at the open end every 2-2.5 inches it will help guide you as you cut.

5. At one end make a tail.  It's about one inch wide by at least 4 inches long.

6.  To make things easier, use the first one and place it on top of another strip and use it as a pattern to cut the scalloped edge.  These don't need to be perfect.

7.  Sew the scalloped edges together.  Contrasting thread adds a little pop of color, but you can do what ever you please.


To get the rest of this tutorial, visit Snowy Bliss

For the vase, I used a glass jar and wrapped white and yellow yarn around it. 


I absolutely love how they turned out!  Now I will always have beautiful flowers at home :]
  

<3 Saleena
 
Continue Reading...

Tutorial: How to make a brush bag

I am taking a painting class this fall, and I am SO excited.  I have always enjoyed painting and have completed a few things here and there (one being my guestbook, seen below) but I have never taken an art class. 

In the midst of my anticipation, I have been collecting all of the required materials for the class, although did not come across a brush bag that would fit my brushes.  [They are quite tall.] So, I decided to get creative and make my own - something unique yet convenient. 

Materials:
Canvas
Material with decorative print
Straight pins
Thread
Ruler
Scissors/Rotary Cutter 
Straps/Ribbon


Step 1: Measure Your Canvas
I started with cutting a corner off of the canvas curtain we used as our photo booth backdrop.  Because it was a corner, two sides were already sewn for me. 


Step 2: Straight pin your sides


Step 3: Sew your sides


Step 4: Measure more canvas material for a pocket, straight pin, and sew.


Step 5: Straight pin and sew pocket on canvas back


Step 6: Measure brushes
I found the easiest way to do this is place your brushes in your pocket and with a ruler draw a vertical line to follow while sewing. Make sure there is a enough room for your brushes to fit while it still being tight enough to hold them in place. 


Step 7: Sew along lines


Step 8: Measure another fabric to be a little bigger than the canvas back


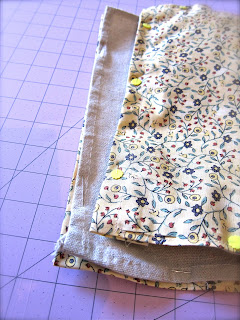
Step 9: Straight pin the sides and sew


Step 10: Straight pin fabric to canvas and sew


Step 11: Straight pin straps and sew
  A couple years ago, Matthew bought me a dress from Anthropologie for Christmas, and the box was tied with this adorable button ribbon.  I've held on to it, knowing I was going to use it somewhere.


Step 12: Sew on your straps
Make sure to only sew a few inches of your straps so you have enough material to wrap around your bag 


And thats it!  Here's the inside...


And the outside :]

This bag will work for make-up brushes and other accessories as well.

Enjoy!

<3 Saleena


Continue Reading...
Related Posts Plugin for WordPress, Blogger...

Followers

Follow Me!

As you may know, Google connect will not be on blogger for much longer, so PLEASE follow me through Linky Followers!