There are so many great things you can do with an old
ladder. They add so much character to a room, especially a room with tall ceilings. They can also function as storage for a bathroom or laundry room. Check out these photos I found on Pinterest for some inspiration.
Materials:
1 3/8” circle drill bit
Power Drill
Compound Miter Saw
One 1 3/8” wooden Dowel
Two 1” x 4” x 6’ wood boards
Tape measure
Pencil
Ten 2 ½” nails
Directions:
Measure where you want the rungs of the ladder to go.
I thought every 12 inches looked good.
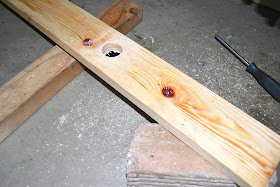
Start with one end of
the board, elevating it off of the ground with bricks or other wood. Carefully, use your drill bit to create a
your circular cut.
Repeat every 12
inches (five holes on each piece of wood)
Next, mark your
wooden dowel. I cut mine every 16
inches. Keep in mind, the ends will be hidden behind the larger pieces of
wood.
Place your dowel in
the holes of one of the pieces. Put the rungs through the holes of the other 1 x 4
Repeat with all other
rungs.
And there you go! Stay tuned for part 2, which will show you how to distress it to make it look vintage.
-Saleena


kütahya
ReplyDeletetunceli
ardahan
düzce
siirt
E2G
Great ppost thanks
ReplyDelete